Showing posts with label wedding. Show all posts

Wednesday, August 5, 2009

I'm Done!

I am done my wedding album! I am so happy!

And so, for the final pictures.

This page I edited from before. I removed some things and added others that will hopefully tie in the album a bit better (Aug 5)

I edited this page as well. I added frames to the photos to help them stand out a bit, as well as a few embellishments that I think add a certain je ne sais quoi! (Aug 5)


I'm really pleased with how this page turned out, especially since it was hard to figure out what to do since the one photo was an odd size. (Aug 3)


I love this page. I think the square look lends itself well to these photos. (Aug 4)

And, the final page! I'm so happy! Funny, the photo itself took longer to edit on gimp than it did to scrapbook this page, haha. I love how it turned out though. Sigh... (Aug 5)
That's it! All done! SOOO Happy!

Thursday, July 30, 2009

So Close!

I think I'll only have one more post after this one, and my album will be done!


The above photo is of the guest list page, and the redid page that I had posted in my last post. The bright yellow one? Yeah, completely different... paper, photos, etc. (July 28)

This one I could finally work on since I had the pictures of us signing now. I wanted to have the photo of the women singing the song that I typed up, but that was a color photo, and to keep both of these pics of us each signing, it wouldn't have worked. Plus, it just wasn't the greatest quality photo either. (July 28)

I did this page today. Took a long time. I had such a hard time with it because I REALLY wanted to use the sheet of paper on the left, this was the only place I could really use it, and it seemed busy, so I had to try to work with it a bit. I'm happy with the result. The ribbon was what really sealed the deal here. (July 30)
Alright, now I only have 5 pages to go! The two of the groom, the two with the both of us together, and the final page. Shouldn't take much since the paper is already picked out for them all. I'm looking forward to this being complete! :)

Sunday, July 26, 2009

Guess what... more Scrappin

Time for more pics.

First some older pages I did ages ago.


This was the last page I did before I quit for 2 years. I quite like this page, so all I did was add the 'boy meets girl' title.

This is yet another old page. Lots going on here. I'm not thinking I'll change this one.

This one needs to change I think. At least adding some borders to the photos would be good. This was my very first page I did.

I love these pics, and as a second page, I think I did much better (I added borders, which helped). I added the 'I'm Yours' title to it today.

This is going to be completely redone. The colors are far too harsh for the album, so the page is going to be taken out completely and I'll be adding in different 'getting ready' pics instead. Sad, really. Then the adjacent page is for the guest list, and the paper shown there is what I'll be using for that.

I finished this page last week Tuesday. I had started on it Monday and was thinking I'd leave it and do 5x7's for the pics instead, but I didn't feel like waiting on it (hahaha) so I just left it with the 4x6's. The 'black squares' in the corner are mirror pieces. I think it turned out rather lovely (July 20-21).

I just finished this page today, and I'm rather happy with it. I got the pics in yesterday (I love Photolab.ca... I can pick my pics online at home, and then the next time we go shopping just go to pick them up). This was one of the pages I skipped due to not having any pics of me coming down the aisle. (July 25-26)

This one I did today. Yup... decided it would be good to do this... since it is the first page. I didn't feel it needed a title... it sort of speaks for itself (not to mention all the words at the bottom of the page make one kinda unnecessary). (July 26)

So, that's that for this week. Now let's see if I can get the other 7 pages done next week... and maybe even the other 2 I wish to redo! Then this book will be complete! :)

Monday, July 20, 2009

Scrappin Some More

The above page took me a bit... trying to pick paper. Why is that so hard? Really... black, black, or this black... it shouldn't be so difficult! Anyway, I like how they turned out. I was going to have 'bride' on one side and 'groom' on the other, and then completely different page 'sets' dedicated to family and the bridal party, but I couldn't fit the pics I wanted of us on only one set, so I'm separating them into two sets instead. These pics lent themselves well to the square look... better than the others. (July 14-15)

I started this page last week Thursday... only to run out of stickies. So, since we were in the city on Sunday, I picked up some more from Dollarama and finished it today! I'm pleased with the look of it. I tried to do something a bit different by not having a border around some of the photos, and adding only one colored pic to each page, and making them sort of the 'negative' of each other... haha. (July 16, 20)

Monday, July 13, 2009

More Scrappin'

This page I had all planned out in my head for years now. And now it's done! I'm so happy with the results! (July 13).

Saturday, July 11, 2009

More Scrapbooking

I finally finished this set of pages... it took me four days! Sheesh.

I had the most trouble with the set up of the right page... mainly because of the setup of the two toasts being so different. I finally decided to try to mirror the left page somewhat instead. I think it turned out rather well (July 8-11)

Friday, July 10, 2009

Scrapbooking

I've finally gotten back into scrapbooking again... after almost two years. Yeah... it's been awhile. I figured since I haven't been doing any work on photos now, I'll post these pics of the pages I've done. I only started last week Saturday...

Here's the page of the guys coming to the ceremony... hubby in the tractor. (did June 27)

This is a pic of my guestbook attendants, candle lighters, and the list of attendants (June 28)

Here's the 'Down the Aisle' page, with the guys walking the mom's down, and then the bridesmaids and flower girl and ring bearer. (June 30). I skipped the next page, due to me not having a printed photo of me down the aisle (photographer only took one in his square film camera... so I have to get those sent in).

The vows, the wedding prayer... I watched to video and wrote everything up, then typed it out and made the titles on the computer as well, since nothing else I had worked the way I wanted. This one took me a number of hours to do. (July 1)
This was a fun page. It sort of spanned two days, but the majority was done on Friday the 3rd, with just a few finishing touches on the left page on Saturday. Yeah... I skipped a few pages in between my last set and this one due to us not having a normal photo of both of us signing the certificate... again, same problem as my aisle photo. (July 3-4)

I wanted only 4 pages for the reception, and two of them had to include stuff on the program, so I needed to put a lot of pics on one spread. Hence, these pages. (July 6-7).


And above, the program page. This includes a brief writeup of the program, and the lyrics to a song that was sung. (July 7-8)

The page I'm currently working on I've been working on for a few days with little success. I'm having such a hard time with the layout. That is always so difficult. I think I've worked something out now, but I haven't even started picking the paper and such... so it may be another day yet before I can post it. That is the page of the 'Roasts and Toasts', so to speak. Basically, what happened at open mike (there was only one speech really) and the toasts. However, the difficulty comes in the toasts page. They were so different... my sister's toast was written up and while not long, it looks long typed. The best man's toast is literally 2 lines long. How do you balance something like that?

Anyway, we'll see what I do, hopefully tomorrow. For now... I want to continue working on it!

Thursday, April 2, 2009

4in1

This wedding photo is not something I would want to scrapbook... unless I could fix it of course. I knew what I wanted to do to fix it, but it was gonna take another 3 pictures blended into this one to do it.

First of all, three of us are sitting. Not really working out so much... so I found a pic of mom standing (she was being walked down the aisle), tried to make it look like she had her arm behind her back, and put her in that way. I moved my SIL's up 'one step' to match with the boys on the other side, added my one SIL's 'back' from another photo someone else took (our photographer chopped her off when he took the pic), moved the boys closer in, took out one BIL who is no longer part of the family anyway (divorce... such a nasty thing)... it worked better with the scheme of things anyway to do so, and he's in another photo anyway. I 'moved' my nephew to stand with the BIL's. Moved dad over too. Then I added me and DH from another photo of us standing. Ok... I guess this is a 5 in one... 'cause I needed my skirt from somewhere as the photo of the two of us had someone sitting on it. Anyway, it took a REAL long time and a lot of work. I think it was well worth the effort. As usual, I faded the edges a bit too.


Not even the same photograph! I love black and white... it's so much easier to match other pics together!

Saturday, March 21, 2009

Another Wedding Pic Edited

I've edited yet another wedding photo. This is one of my husband and his family. I could also move people closer together, but that will take so very long and I don't feel like doing so much work... so here's the first photo.

And the edited version. I moved everyone sitting 'up a stair' so to speak, got rid of the rug and walls (his cloth wasn't big enough... should have taken family pics without the cloth then, ah well), and faded the corners to soften it. What do you think?

Tuesday, March 17, 2009

Editing Wedding Pics

Well, I edited another of my wedding pics. Very similar to the last one. I have many more to edit, mostly just fading the edges and resizing them, some of them I want to mute the coloring so as to make them work a bit better with all the black and white photos. My entire ceremony is in black and white, so I'll have to make that work for me. Anyway, here is the pic I edited today.
First, the old picture...

And now, the edited version!

Thursday, August 28, 2008

More Editing

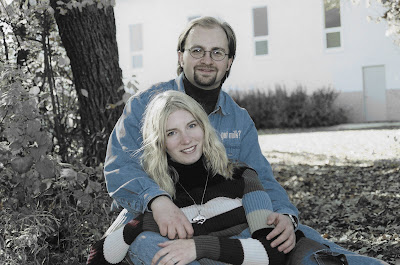
So, I have two new photos for you to enjoy. The first one is one of our fall engagement pics. The pic is the same, I just made it black and white with only us in color, as well as a bit of other blue bits in the photo. I also toned the color down a lot, to give it a faded look.

To do this sort of thing was relatively simple. All you do (in gimp) is the following: First, make a copied layer of your photo. Then, go to filters, then colors, then colorify and make one layer black and white. Copy the original layer again, and place it "on top" so it is first. Pick the color you want to keep using the 'select by color' button on the toolbar. Invert the selection using another one of the buttons, and then erase everything you can! (I like to make a giant brush using the brush making tool and use that to erase much larger sections at once). Then, on the window with the layers where it says Mode: Normal, pick "color" from the drop down menu, and then select the opacity you want to give it a more "faded" effect. Voila. You can do as many colors as you want, or you can just 'paint in' your own color on a transparent layer.



This next pic is at our wedding. In the first one you will see a sign and a blanket, and in the second, they are gone! Basically, all you do is create another transparent layer, copy the "sand" or "branches" you wish to have cover whatever you want removed (select the transparent layer and when you've selected what you want with the selection tool, click on 'edit', 'copy visible'), and move the copied segment onto the transparent layer using the move button, then the anchor (it shows up on the mouse automatically, just be sure you have the transparent layer selected, not the original layer you copied it from) to place it on your layer. You can then erase bits of it to make it work.

To make it look more realistic, I added a shadow below my dress (using a transparent layer, black, making it more opaque of a layer, using gaussian blur to make it less sharp, and then erasing portions of it). I also did the same fuzzing technique around the edge of the photo using a green color I 'eyedropped' from the trees.


Voila... and you can have so much fun once you get to know the gimp tools a bit better. Try playing around with them a bit. It's very similar to Adobe Photoshop, but it's free. However, it does take a while to get used to the program. I'm sorry if my explanations seem... vague or confusing. If you need better ones, email me! I'll do my best to describe things a bit better. Perhaps I'll eventually post screenshots of where each button is and step by step instructions... if people ask for them of course.

Enjoy!

Tuesday, June 3, 2008

Adding more color

It's been awhile since I've worked on any of my pictures. I have another picture I really liked the look of, but kind of wanted to see it in color. Unfortunetly the scan was not very good quality, and when I look at it close up it is blurred and in general, not as good as if I could just have it printed directly from the film in black and white. So, what I'll probably do for my scrapbook is have the picture below in black and white, and then add a smaller picture, which is in color, to the corner of the page of dad giving me a kiss on the cheek. I think that would be a lovely page, especially since I want to have this picture printed in a 6x6 or maybe larger (as it is square... perhaps I'll just do it as an 8x10 or something).

Here is the original scan. Once again, the quality of a black and white scan is not so great.

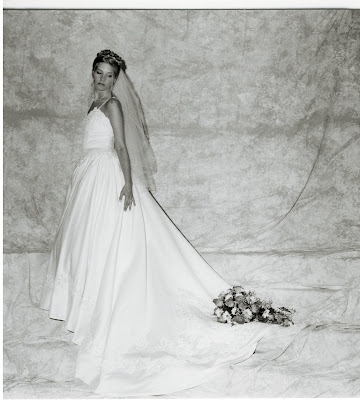
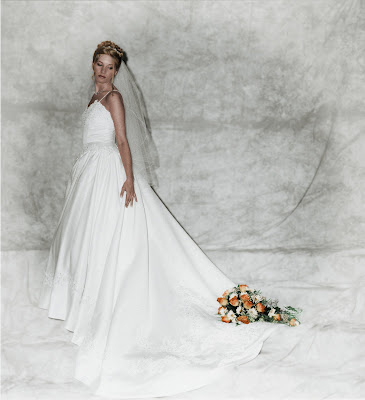
And here I added color using another photo, blurred the background, and added a whiteout blurring effect to the edge of the photo.

Friday, March 7, 2008

Adding Color to B&W

I have one picture I really liked, and it was taken by my photographer in 3 black and white pics. No color. So, I added color using another picture and the "eyedropper" tool. I again added some blurring and whiteout effects.

Picture Perfect

I thought I should make a new spot for my picture modifications. I have been working like crazy to modify some of my wedding pics to make them what I want them to look like, and I thought... hmmm, why not put this on my blog? In one spot? Good idea?

So, I will post a few pictures I've modified, including the one I started with, and the final product. By the way, I use a program called Gimp, which is free at http://www.gimp.org/.

Here are the first two pics I worked on.


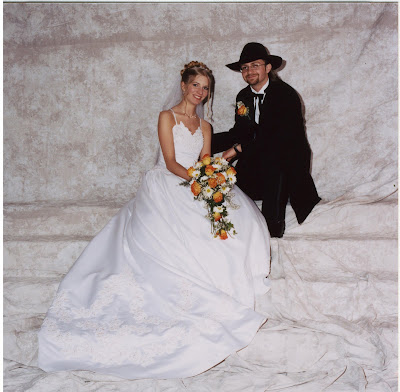
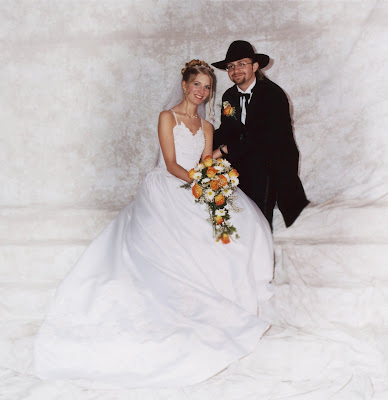
This is the original. I thought it was a nice pic of the two of us, unfortunetly we were too far apart in my opinion... and the pic was a bit dark for my taste.


So here, I brought us closer together, brightened the pic, and added some blurring and whiteout to the edges for interest.


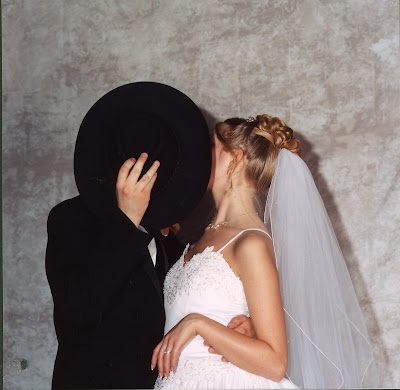
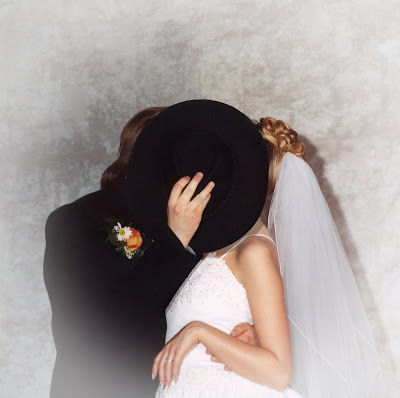
I love this pose idea... but hate the fact that my face is completely exposed (as a photographer you should be able to see this kind of thing and move people into position instead of just "click")


So, seven hours later, I added in Chuck's head from another picture I had of us kissing without the hat, moved his arm, added the flowers, and then also fixed the little imperfections and brightened everything, adding another blurring and whiteout effect.

Overall, I feel these two pics turned out rather lovely after all the work! Hours of it! But, it's worth it. Now to print them out to add to frames, and scrapbooking. :)