To do this sort of thing was relatively simple. All you do (in gimp) is the following: First, make a copied layer of your photo. Then, go to filters, then colors, then colorify and make one layer black and white. Copy the original layer again, and place it "on top" so it is first. Pick the color you want to keep using the 'select by color' button on the toolbar. Invert the selection using another one of the buttons, and then erase everything you can! (I like to make a giant brush using the brush making tool and use that to erase much larger sections at once). Then, on the window with the layers where it says Mode: Normal, pick "color" from the drop down menu, and then select the opacity you want to give it a more "faded" effect. Voila. You can do as many colors as you want, or you can just 'paint in' your own color on a transparent layer.

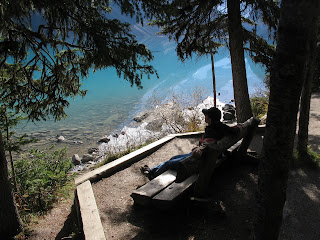
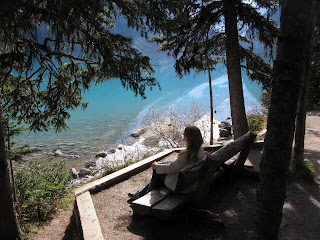
This next pic is at our wedding. In the first one you will see a sign and a blanket, and in the second, they are gone! Basically, all you do is create another transparent layer, copy the "sand" or "branches" you wish to have cover whatever you want removed (select the transparent layer and when you've selected what you want with the selection tool, click on 'edit', 'copy visible'), and move the copied segment onto the transparent layer using the move button, then the anchor (it shows up on the mouse automatically, just be sure you have the transparent layer selected, not the original layer you copied it from) to place it on your layer. You can then erase bits of it to make it work.
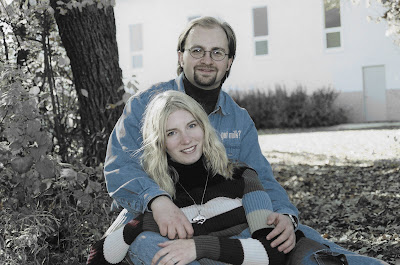
To make it look more realistic, I added a shadow below my dress (using a transparent layer, black, making it more opaque of a layer, using gaussian blur to make it less sharp, and then erasing portions of it). I also did the same fuzzing technique around the edge of the photo using a green color I 'eyedropped' from the trees.

 Voila... and you can have so much fun once you get to know the gimp tools a bit better. Try playing around with them a bit. It's very similar to Adobe Photoshop, but it's free. However, it does take a while to get used to the program. I'm sorry if my explanations seem... vague or confusing. If you need better ones, email me! I'll do my best to describe things a bit better. Perhaps I'll eventually post screenshots of where each button is and step by step instructions... if people ask for them of course.
Enjoy!